Wrap-up of Week 1
Jessica Sprague is currently offering a free course to teach hybrid cardmaking called Computer Tricks for Cards. It runs for two weeks and we are currently in the second week of the course already.
As usual, I'm running really behind, so thank goodness that it's a self-paced course despite the classes being posted daily. Over the weekend I thought I'd better catch up, so amidst lots of procrastination, taking the dogs for walks and feeding us all, I managed to go through all the lessons up to last Friday. So without further ado, let me show you what I did:
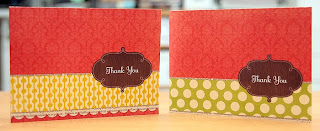
The first class was to try printing on different papers to see what they all look like. The top photo was the original file and I printed it on matt photo paper. In the bottom photo, I used different digital papers (Shabby Princess Vintage Floral), but printed on normal 190gsm cardstock.
Still on the first class, but a different card. As above, the top photo was the original file and the bottom photo I used different digital papers (Gina Jane Butterfly Gold from Daisie Digitals. I printed the original file on gloss photo paper and matt photo paper.
The second class taught us how to "clip" papers to various digital elements. A simple card, but I did learn something as I didn't know how to use clipping masks. :D
The third class is where the card got a bit more interesting, and not so "flat". This one had dimension and I learnt how to use digital elements paired with real life supplies to create a great looking card. I used Fiskars Threading Water and Upper Crest punches, and I have no idea where the ribbon is from! I changed the greeting as the original was "Congratulations". I don't usually give congrats cards so thought HB was more useful. :D
I think this one is my favourite card so far. The making of it was a teeny bit more complex, but still very easy. The top photo shows the outside of the card, nothing special but quite cheerful and colourful. I love the pop up bit when you open the card (bottom photo) as I think it's really cute. I added the greeting and tree border in a moment of rare creativity. LOL
Finally, Friday's class. I learnt how to use Photoshop Brushes as stamps (the different camera images on the background kraft card are all from a Photoshop brush), which was pretty cool. The rest of the card was just basic assembly. The bottom photo shows the inside which is something different - not an element I'd think of to put inside a card, but there you have it!
Saturday's class was about making a card holder to hold all our cards, but I think I'll skip this one and make it another day. Sunday was a revision day - to go back over what we learnt throughout the week and see if we can apply it to our own cards.
So far I'm loving this course as I've learnt a few things about Photoshop that I didn't know before. The cards aren't really my style and I do kinda find them a little "flat", if you know what I mean. I still love the lumpy bumpy look!
Join me again at the end of the week for a wrap up of this week's classes. :D
*hugs*


2 comments:
Fab selection of cards Winnie. Isn't it amazing how just a few changes can make the basically same cards appear so different.
Toni :o)
WOW - you have made some brilliant cards. Even if you don't get around to making anymore these will keep you going for a while. Looking forward to seeing more.
It looks a really useful class.
Post a Comment